Access your Raspberry Pi Terminal and Graphical Desktop remotely using SSH and VNC
This post will cover the steps necessary to set-up remote access to the Raspberry Pi terminal and graphical desktop environment from a Windows, or Linux PC. I do not have a Mac, but the steps should be very simillar. In some posts this is referred to as running your Raspberry Pi “headless”.
I want to put my Raspberry Pi 2 on a small mobile robot platform, so I can’t have it drag a mouse, keyboard and monitor around. The steps below will work for Raspberry Pi models B, B+ and 2.
My starting point was the official Raspberry Pi documentation page. This is an open source project and more information is being added on a regular basis. Be sure to bookmark the site and check for updates. I also added some additional info, based on my mistakes and some forum posts I read, so keep reading…
To access the Raspberry Pi terminal and issue text commands remotely, we will be using the SSH (Secure Shell) protocol. You could also transfer files and even access some graphical applications over SSH using what is called as “X forwarding”. “X” is a window systems used in Unix and also Linux systems, like the Raspbian OS on the Raspberry Pi.
SSH works fine for accessing the Raspberry Pi terminal, but occasionally you need to acess the graphic desktop as well. After some trial and error, I found that for access to the Raspberry Pi graphical desktop and applications, VNC works better than X forwarding over SSH. Also, VNC can be used from both Windows and Linux machines in pretty much the same way.
What you need
- A working Raspberry Pi with Raspbian installed and configured on a compatible SD / Micro SD card. This post covers the steps to get that set-up, if you have not done so already.
- Keyborad, mouse, monitor/TV and HDMI cable to configure the Raspberry Pi, at least until you finish the steps in this tutorial.
- The raspberry Pi needs to be connected to your router, supporting DHCP (as almost all currently do) with an Ethernet cable, or via an USB Wi-Fi adapter. The Raspberry Pi supports connections via the Ethernet port out of the box. Configuring the Wi-Fi access requires some manual steps and will be covered in a separate post.
- The computer from where you will access the Raspberry Pi.
Remote access to the Raspberry Pi Terminal
Enable SSH on the Raspberry Pi
Remote command line access to the Raspberry Pi via SSH can be enable via the Raspberyy Pi Software Configuration Tool. To launch it open the Raspberry Pi Terminal and type:
sudo raspi-config
Once you hit the Enter, the following screen should appear:
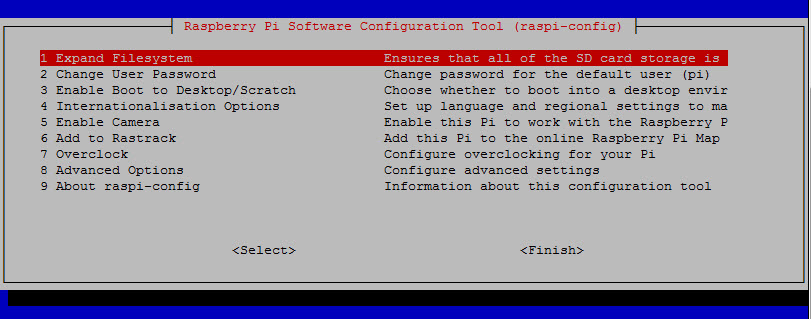
Navigate to item 8 “Advanced Options” using the arrow key and hit Enter.
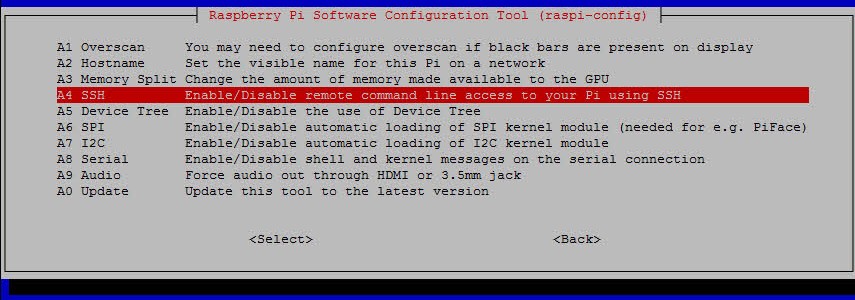
Here select item A4 SSH. You will get a prompt to Enable / Disable the SSH Server on the Raspberry Pi.
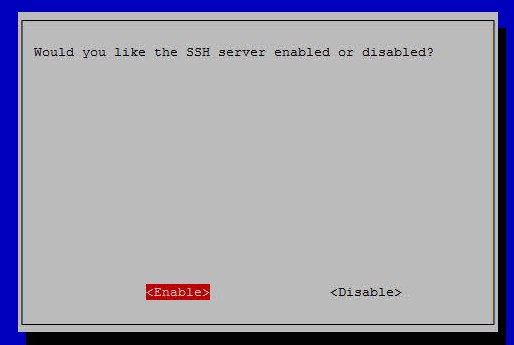
Select <Enable> and hit Enter. If all is well, you should see the confirmation below.
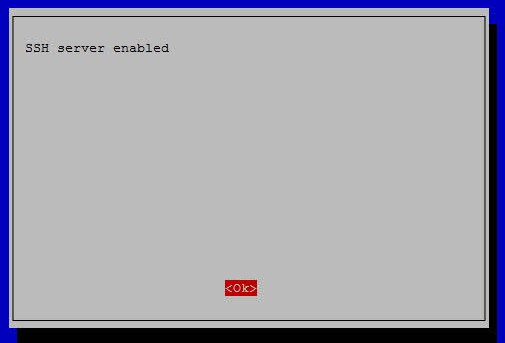
Hit the Enter key to go back to the Main Menu of raspi-config, navigate to the <Finish> option and hit the Enter key again. You will get back to the Terminal window and should see something like this:
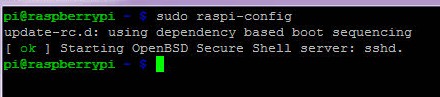
Done! You have an SSH service (daemon) running on your Raspberry Pi. It will start on boot, so you only need to go through this process once.
Next we need to identify the IP address of your Raspberry Pi. In the terminal type ifconfig and press enter. A list like the one below should appear:
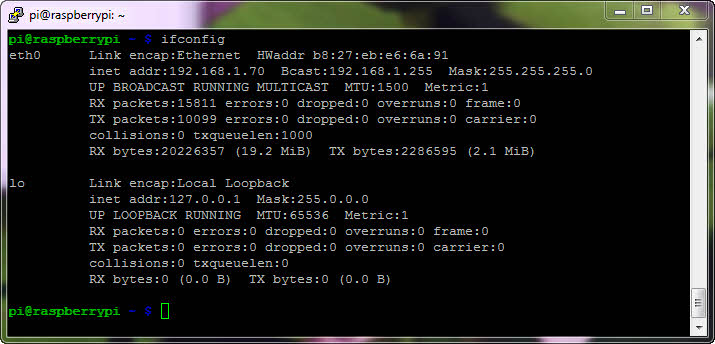
What you are looking for is the address listed next to “inet addr:”. In the image above, my Raspberry Pi is connected to my router via an ethernet cable. This connection is listed as “eth0” and the IP address of the Pi is 192.168.1.70. If you are connected to your router via a USB Wi-Fi dongle, the connection will be listed as something like “wlan0”. Write down this IP address, as you will need it later!
Alternatively, if you have access to your router configuration page, your Raspberry Pi’s IP address will be there as well, under the list of devices connected to your network.
Steps for Windows
On Windows you need to install an SSH client in order to be able to access the Raspberry Pi terminal remotely. PuTTY is one of the most popular such client program. The latest version can be downloaded from greenend.org.uk. Look for the section called Binaries and the subsection For Windows on Intel x86. You need the putty.exe file. PuTTY comes as a single putty.exe file and does not require an installation. Just copy the file to a convenient location on your PC.
P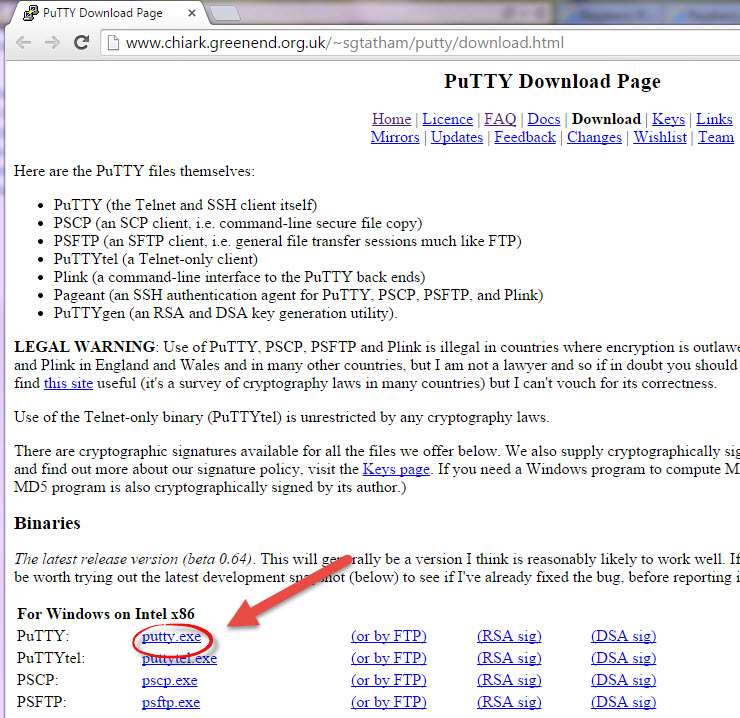
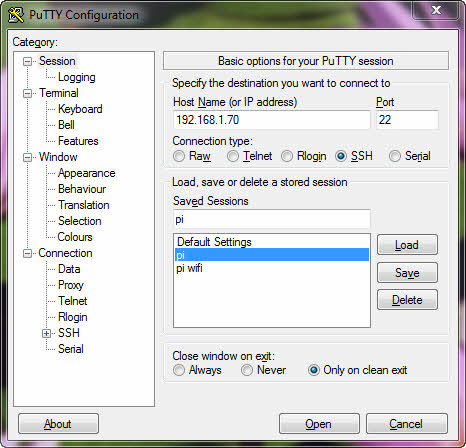
Double click on the putty.exe file to start the program. You will be presented with a login / connection set-up screen. Type the IP address of your Raspberry Pi in the “Host Name (or IP address). The default port should be 22, leave that unchanged. Make sure that SSH is selected as the connection type and then click on Open. You can save this settings as well, for quicker access. In the screenshot below, I have saved the settings for my Ethernet and Wi-Fi connections, which have different IP addresses. For more information on PuTTY, refer to the application documentation.
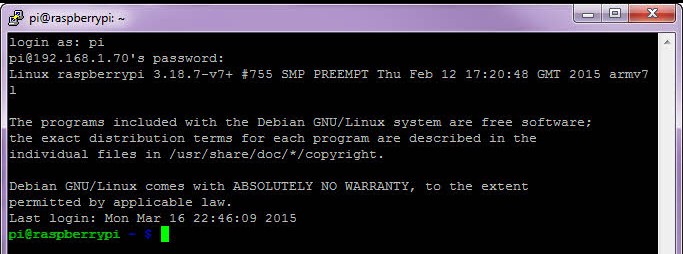
You may be presented with a security warning. Assuming that you have entered the correct IP address of your Raspberry Pi in the previous step, it is safe to acknowledge the warning and continue, by pressing Yes. This will cache the connection and you will not see this warning in the future. You will then be prompted to enter your username and password. This is the Raspberry Pi username / password (pi/raspberry, by default). After you login you will see the familiar prompt on the Raspberry Pi terminal:
Steps for Linux and Mac
On a Linux, or a Mac machine you can access the Raspberry Pi remotely over SSH directly from the terminal and do not need to install any additional software. Open your terminal and use the following command:
ssh pi@<IP Address of your Pi>
Naturally, replace <IP Address of your Pi> with, well…the IP address of your Raspberry Pi that you wrote down earlier. You may see a security warning on the next step. Type yes to acknowledge and continue. You should only see this warning the first time you connect. You will then be prompted to enter your username and password. This is the Raspberry Pi username / password (pi/raspberry, by default). After you login you will see the familiar prompt on the Raspberry Pi terminal.
Remote access to the Raspberry Pi graphic desktop environment using VNC
VNC (short for “virtual network computing”) is a desktop sharing system that allows remote access to the graphical interface of one computer (in our case the Raspberry Pi) from another (your desktop / laptop). It will transmit keyboard and mouse events from your laptop / desktop to the Raspberry Pi and will provide a view of the Raspberry Pi graphical desktop on your laptop / desktop. For this to work you need a VNC server set-up and running on the Raspberry Pi and a VNC client on your desktop / laptop.
The Raspberry Pi official VNC documentation page suggests using tightvncserver on the Raspberry Pi and that worked well for me. To install tightvncserver, open the Raspberry Pi console (either directly on the Pi, or remotely, using SSH) and type:
sudo apt-get install tightvncserver
You will see something like this on the console:
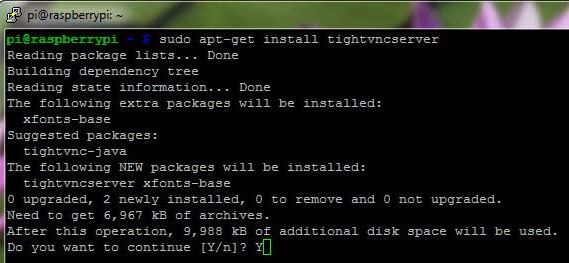
Type “Y” and hit enter to continue and the installation script should do the rest. Next you need to run tightvncserver by typing
tightvncserver
in the console:
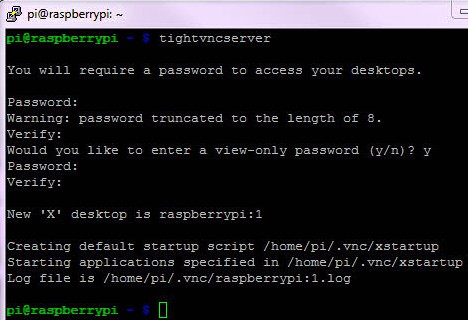
You will be prompted to create a password for remotely accessing the Raspberry Pi desktop. You can also set-up an optional read-only password (I did not). Remember the password, you will need it every time you connect to the Raspberry Pi desktop environment remotely! Once you do that you will see a message like “New ‘X’ desktop is raspberrypi:1”. This means that you have a VNC server up and running on the Raspberry Pi!
The Raspberry Pi official VNC documentation page has instructions on how to get tightvncserver to run at boot. I did not go through that step, as I do not need access to the graphic desktop that often. Instead I open an SSH session to the terminal and manually start the vncserver on the Raspberry Pi using a command like this:
vncserver :1 -geometry 1920x1080 -depth 24
This will create a new virtual desktop on display 1, at 1920×1080 (full HD) resulution and a colour depth of 24 bits per pixel. For a full list of options see the tightvnc page.
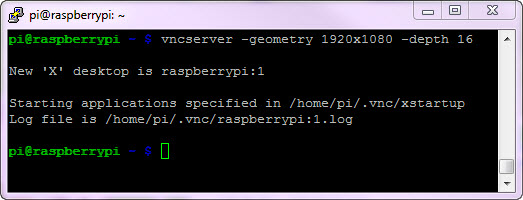
You should see a line like this:
New ‘X’ desktop is raspberrypi:1
The number after “raspberrypi:” is important (in my case it is 1). You will need this number to connect from the client. Now that the vncserver is running on the Raspberry pi and a new desktop is created, let us connect to remotely.
Getting a VNC client for Windows
On a Windows machine, you need a VNC client. The Raspberry Pi documentation page suggests the TightVNC client, but I use the VNC viewer by Real VNC. Both a free programs, so take your pick. The VNC viewer from Real VNC comes in an EXE file and does not need an install. Just save it in a location you can find easily and run it. You will get a prompt like this:
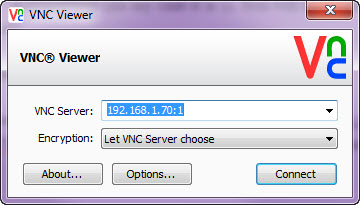
In the VNC Server field, type the IP address of your Raspberry Pi, followed by a column and the number of the ‘X’ desktop that you saw when you started the vncserver on the Raspberry Pi in the previous step. In my case the IP address of my Raspberry Pi was 192.168.1.70 and the display number was 1, so the full connection address is: 192.168.1.70:1. Once you hit Connect you will be prompted for a password (the username field is displayed, but not accessible).
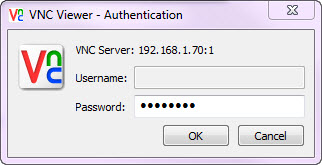
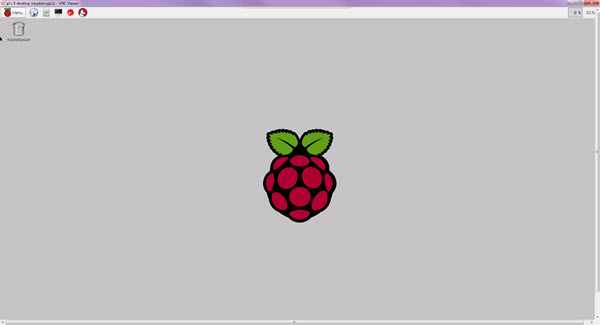
Enter the password you created earlier, when you run tightvncserver on the Raspberry Pi for the first time (see above). Hit OK and you should see a big raspberry on your screen!
Getting a VNC client for Linux
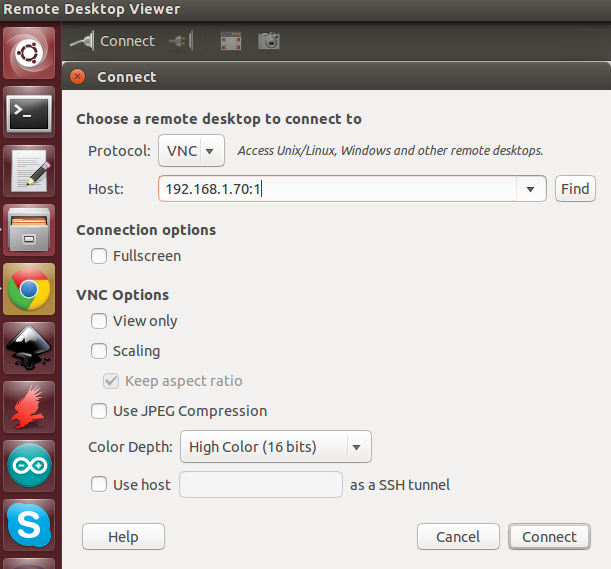
On my Ubuntu laptop, I use Remote Desktop Viewer, as recommended by the Raspberry Pi documentation page. It is likely already available on your Linux distribution. Another option you may have is the Remmina Remote Desktop Client (works almost in the same way). On Remote Desktop Viewer you need to click on the Connect button in the top left and you will get a prompt like this.
You need the IP adress of your Raspberry Pi and the screen number assigned by the current session of the tightvncserver (see above). Again, in my case the IP address of my Raspberry Pi was 192.168.1.70 and the display number was 1. Enter this on the “Host:” line and click the “Connect” button in the lower right corner.
You should be prompted for a password. This is the password you setup earlier, when you run tightvncserver on the Raspberry Pi for the first time (I told you you will need to remember it!). Hit OK and you should see your Raspberry Pi graphic desktop environment!
Shutting Down the VNC Server on the Raspberry Pi
When you are done with your remote desktop session, you can shut down the VNC server on the Raspberry Pi. TO do that you need to issue the following command on the Raspberry Pi terminal:
vncserver -kill :1
Replace 1 with the number of your display. Note that there is a space between the -kill and the semi-column. Just closing the VNC client session will leave the vnc server process running in the background. Not a big deal, but why waste resources on the Pi?
Thanks now i can finally control my Raspberry Pi from my computer no need to plug in keyboard , mouse and Monitor . Thanks.
What’s the point in using tightVNC? It just adds extra overhead to the pi. A better solution is to just forward the pi’s X session over SSH. No extra software and the pi doesn’t have to do any extra heavy lifting. Use the -X switch when connecting to enable X forwarding. (ssh -X pi@). Once logged in over SSH, you can start an X session by typing “/etc/X11/Xsession” without the quotes.
Good point on X forwarding, but I occasionally connect to the Pi from a Windows desktop. Also, I found that I have better performance with VNC and my Ubuntu laptop as well.
Great post. I used to be checking constantly
this weblog and I am inspired! Very useful information specially the final
phase 🙂 I take care of such information much.
I was seeking this particular info for a very long time.
Thank you and good luck.
You will see the desktop of the Raspberry Pi inside a window on your computer. You’ll be able to control it as though you were working on the Raspberry Pi itself.
Do you have a step-by-step for directly connecting a linux box to a headless RPi?
I can successfully connect via ssh when linux box has Ethernet connection to router and RPi has direct connection to router. Unable to ssh when I connect the Ethernet (standard or cross-over) cable directly from the linux box to the RPi.
Thanks.
Never tried that type of connection, sorry…
First set of instructions to reach this goal that I’ve found after days of trial and error. Works like a charm!
Great chronology of steps to be taken, allowing me to do the whole thing on my W7 tablet, however VNC-enabling on my Pi was set already.
Will have to adjust the geometry params, but that a detail (I hope).
Thanks so much for this outstanding clarification!
Friend!
Thank you for this great tutorial! It was very easy to follow & comprehensive. Great graces be with thee!
This is excellent. I benefited a lot.
This was so helpful and worked perfectly first time. Thank you
It works very well, I had to overtire the files of the VNC Server which was already installed in Rasbian.
I am just happy it is working.
The above steps seems to be very technical and complicated. Instead, I would recommend using tools like logmein, R-HUB remote support servers etc. for remotely accessing Raspberry Pi terminal from Windows computers.
I probably sound dumb asking this but I just bought my first RPi 3B+. I’m 59 and never ever used these before and decided it was time. I want to collect and transmit Relative Humidity, Pressure and Temperature data from a DHT11. Can this do this?
Can you access your PI# terminal with Terminus or Prompt 2 app from your phone ?
Thanks for the tutorial. It worked great.
Thanks. Your tutorial is awesome.
Thank you
it’s a really small GUI
Thanks, since long time a comprehensive and immediately working documentation. Best regards Goetz