In the following examples, I will be using the NodeMCU development board and will program it with the Arduino software. Hopefully you have already set-up your ESP8266 development environment and were able to load the blink sketch. If not please follow this tutorial first.
ESP8266 WiFi station mode example
The ESP8266 can communicate over WiFi in two different modes. It can connect to an existing wireless hot spot, or access point, similar to the way you connect your phone or computer to the Internet. This is called “station” mode. In station mode the ESP8266 board can reach out to the internet and may also communicate with other devices connected to the same network, including other ESP8266 modules. Here is a simple example. Remember to replace the values for the ssid and password variables with the name and password for your wireless network!
Once you load the code on your ESP8266 module, open the serial monitor and restart the module (pressing the reset button on the NodeMCU board will do the trick). All of the code executes in the set-up function, so it will only run once. You should see something like this, if all is well:
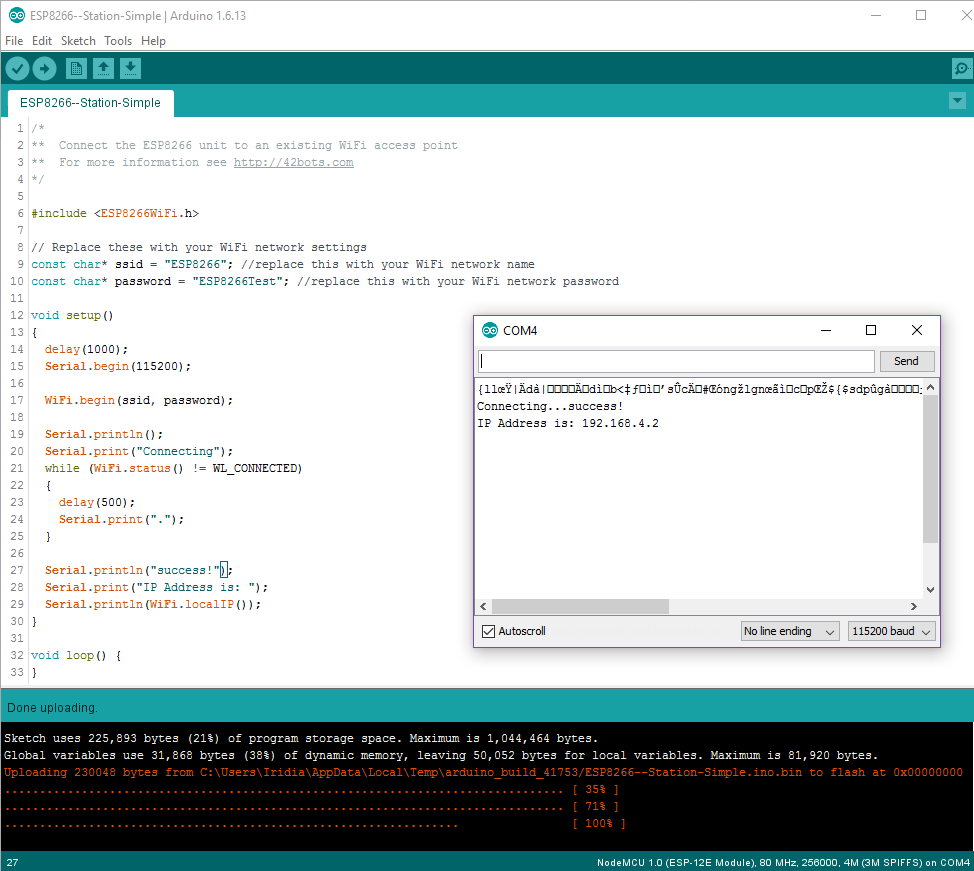
If you have access to your router admin screen, you should see the ESP8266 module in the list of connected devices.
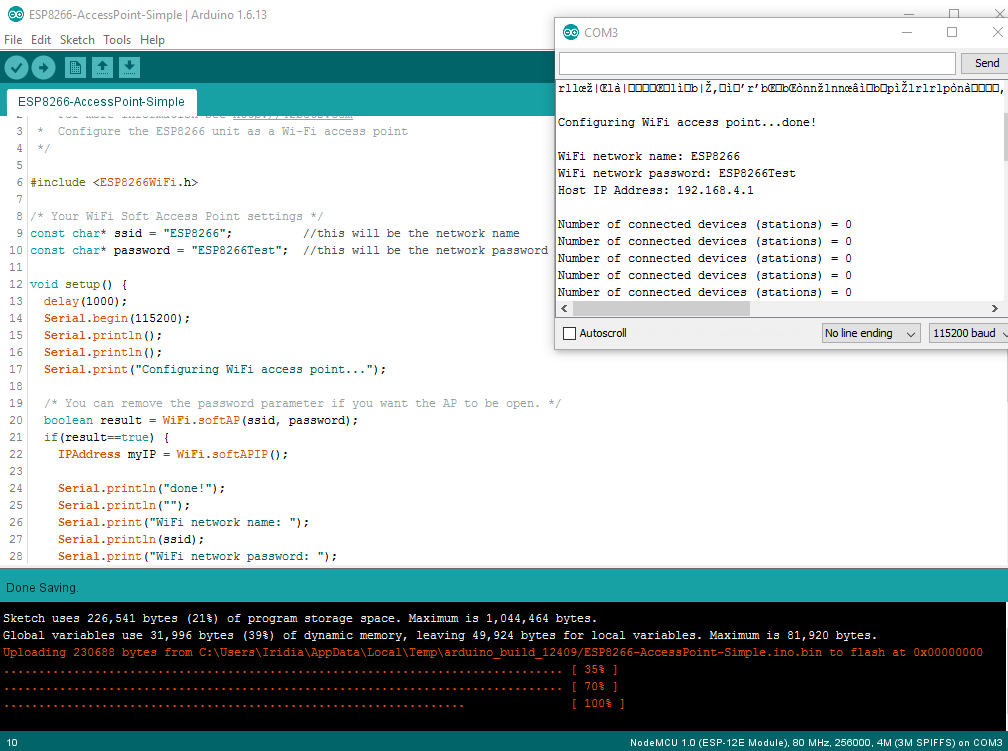
ESP8266 WiFi Soft Access Point (Soft AP) example
Wi-Fi access points (AP) act as a hub for one or more stations (like your phone, or PC). An access point is connected to a wired network and often integrated with a router to provide access to stations connected to it to the Internet. If an access point is not connected to the Internet through a wired network, it is called a soft access point
ESP8266 module can operate as a soft access point (Soft AP) and support up to 5 Wi-Fi client devices, or stations, connected to it. Here is basic example code to turn the ESP8266 into a Soft Access Point:
When you load this script to the ESP8266 module, you should see the following serial output:
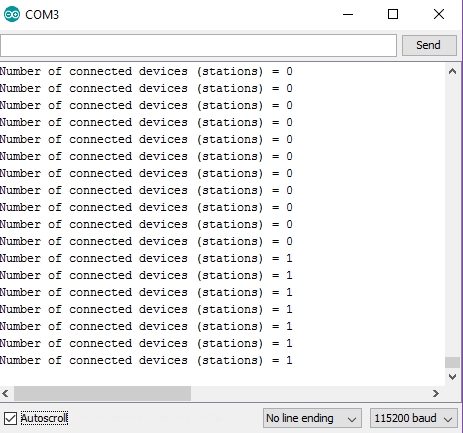
Now if you open the Wi-Fi connection menu of your phone and check the available networks, you should see a new one in the list. If you left the default settings in the sketch above, it will be called ESP8266. Connect to it, using the password in the same sketch and check the serial output again – you should see the count for devices connected increment.
That is all! The ESP8266 is also able to operate both in station and soft access point mode at the same time.
If you have two ESP8266 devices, you can make one be a station and the other an access point and they will be able to communicate with each other.
In the next tutorial, we will set-up a basic web-server on the ESP8266 module and serve HTML pages that will allow us to
– read data from the ESP8266 GPIO pins and display it in a browser window on your phone, or computer
– control the pins of the ESP8266 (turn an LED on and off) from a mobile phone, over Wi-Fi
Comments
Comment by Dan L on 2017-09-26 11:42:20 -0700
Followed all of your tutorials up to this one and specifically “ESP8266 WiFi station mode example” and got the results you indicated I would get. However on this topic, I got a library not found on “#include “.
Any suggestion would be appreciated.
Comment by Dan L on 2017-09-26 11:50:49 -0700
OOPs, I just realized the board on the IDE had changed to an UNO when I rebooted. It does compile now. Sorry for posting my error.
Comment by Alexandre arrivé on 2017-11-10 07:37:02 -0700
Very useful tutorial! Me and some friends are on a degree project, I wondered if the soft access point could be used not as an open network but as a VPN. Context : we’re designing an app that would connect to the hidden VPN to transfer technical data, without other phone users being able to see the hotspot.
Also, does the ESP8266 works standalone, or can it be connected to an Arduino Uno R3?
Best reagards from France, please answer quickly!
Comment by Marie on 2018-03-04 10:51:44 -0700
Amazing tutorial! clear, easy to follow/understand, works like a charm. Thank you, much appreciate 🙂
Comment by Nitish Latni on 2018-07-18 06:07:24 -0700
How to send data(string) from connected server to ESP8266 wifi module to see in serial monitor ?
Please help me out!!
Comment by Vanessa on 2018-08-12 06:07:38 -0700
Thanks, Amazing tutorial!!! Very simple!
Comment by sagar on 2018-11-02 03:05:49 -0700
how to set serial ssid and password esp8266 nodemcu???
Comment by Hend Adel on 2019-04-25 07:52:23 -0700
Good example, but it doesn’t work with me, until I added WiFiClint library
#include
Comment by ArakelTheDragon on 2019-10-24 23:59:50 -0700
Great! This is useful for beginners and experts in understanding how things work.
Comment by tiger on 2020-05-14 01:09:34 -0700
Can it be linked to the STONE display module https://www.stoneitech.com/product/by-application/industrial-type
Comment by Nur Awal on 2024-07-06 07:03:54 -0700
I just started to learn esp8266, thanks for tutorials